Create Fingering
Create Fingering
Save a custom scale fingering to the database after you define it on the main fretboard. For connected fingerings with finger numbers, see Add Finger Placement.
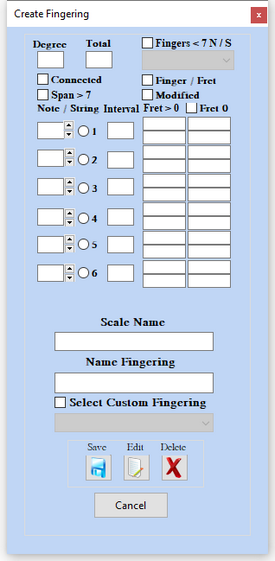
Path A — Horizontal custom fingering
1) Start from a custom scale
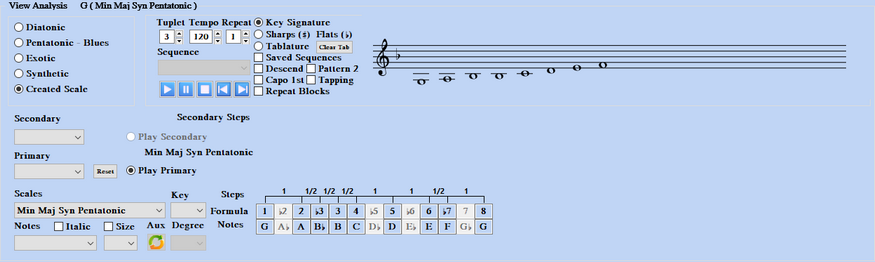
Select a custom scale group (for example G > Min Maj Syn Pentatonic) so the fretboard shows the scale you want to finger.
1) Creating Custom (No Unison Notes) Connected Fingering with Finger Placement Numbers
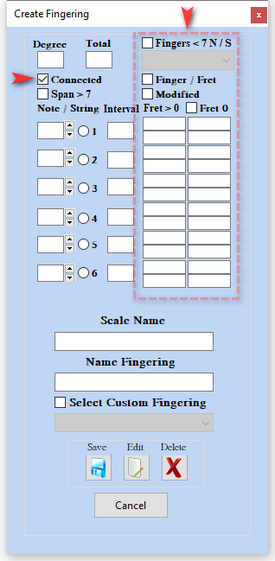
2) Create a Non Unison Note Connected Fingering
2a) Select Custom Fingering in Fingering Type PopUp Menu
2b) Set Fret Number and Note / String with UpDown Arrows (Fret | N/S) for all 6 Strings. Select Checkbox (Next to Save Button) to Display in Fret Board.
2c) Press the Save Button to Open Creat Fingering with Loaded Fingering.

3) Create Fingering Window Opens with Fingering Loaded with Note / String and Interval
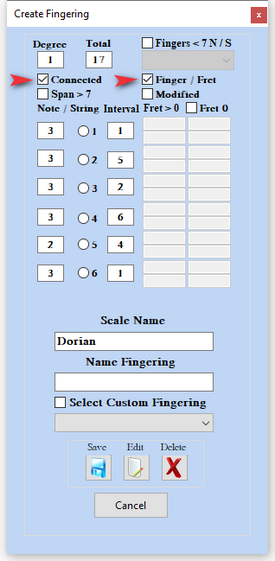
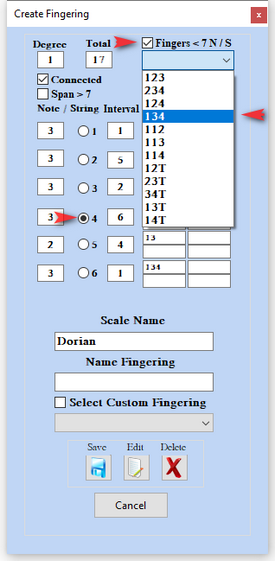
3) Select Radio Button 6 for String 6 & Checkbox Fingers < 7 to Enable and Open PopUp Menu with 3 N/S Fingers Number Sets. Select 134 to make it appears in the TextField
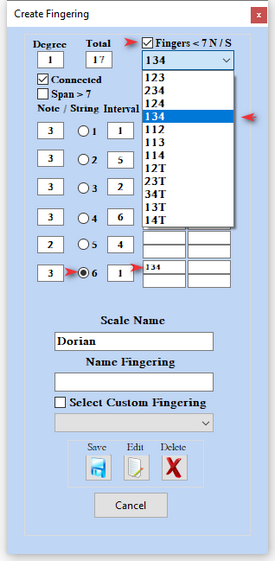
3) Select Radio Button 5 to 4 and Select Finger Sets
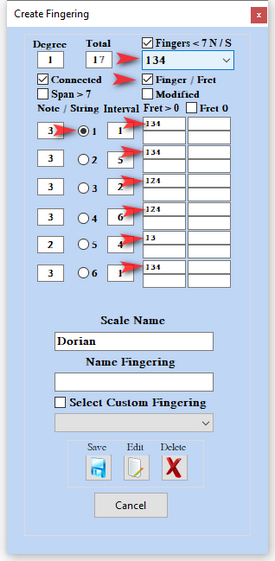
4) Select String Radio Button 6 to 1 to Complete all the sets for Finger Sets for Finger / Fret Finger Placements
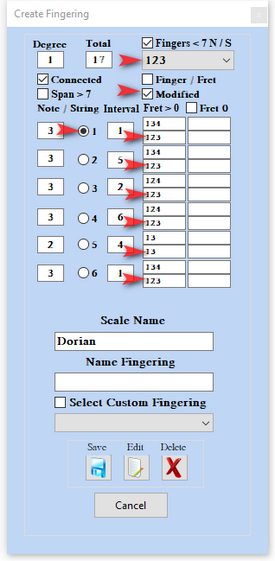
5) Select String Radio Button 6 to 1 to Complete all the sets for Finger Sets for Modified Finger Placements
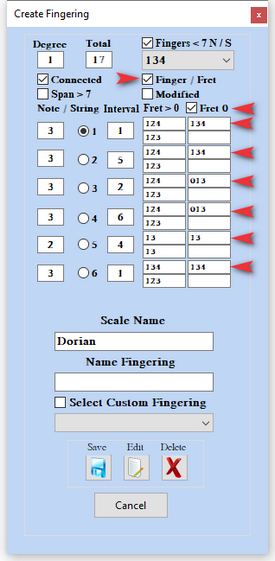
6) Select String Radio Button 6 to 1 to Complete all the sets for Finger Sets for Checkbox's Fret 0 & Finger / Fret Finger Placements
7) Select String Radio Button 6 to 1 to Complete all the sets for Finger Sets for Checkbox's Fret 0 & Modified Finger Placements
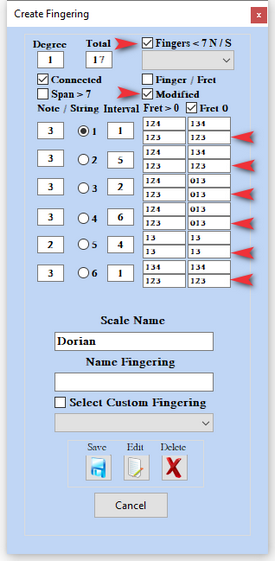
2) Create a Non Unison Note Connected Fingering
2a) Select Custom Fingering in Fingering Type PopUp Menu
2b) Set Fret Number and Note / String with UpDown Arrows (Fret | N/S) for all 6 Strings. Select Checkbox (Next to Save Button) to Display in Fret Board.
2c) Press the Save Button to Open Creat Fingering with Loaded Fingering.
3) Create Fingering Window Opens with Fingering Loaded with Note / String and Interval
3) Select Radio Button 6 for String 6 & Checkbox Fingers < 7 to Enable and Open PopUp Menu with 3 N/S Fingers Number Sets. Select 134 to make it appears in the TextField
3) Select Radio Button 5 to 4 and Select Finger Sets
4) Select String Radio Button 6 to 1 to Complete all the sets for Finger Sets for Finger / Fret Finger Placements
5) Select String Radio Button 6 to 1 to Complete all the sets for Finger Sets for Modified Finger Placements
6) Select String Radio Button 6 to 1 to Complete all the sets for Finger Sets for Checkbox's Fret 0 & Finger / Fret Finger Placements
7) Select String Radio Button 6 to 1 to Complete all the sets for Finger Sets for Checkbox's Fret 0 & Modified Finger Placements
2) Custom Fingering checkbox
Leave Custom Fingering unchecked on the main window while you build the first horizontal pattern.

3) Fingering Type
Open Fingering Type and choose Custom Fingerings.

4) Set Fret and N/S
For each string, set Fret and N/S (Note/String) with the arrows. Example: strings 1 and 2 at fret 0 with N/S greater than 0; strings 6 through 3 at fret 0 with N/S 0. Check the box next to Save to show the pattern, then press Save on the main window to open Create Fingering with the pattern loaded.

5) Create Fingering opens with imported data
Note/String, fret, and interval fields load (for example nine Note/String entries for a horizontal pattern).
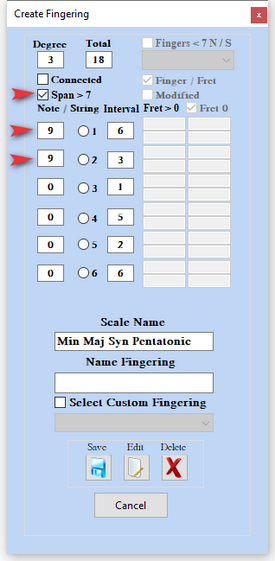
6) Name the fingering
Use a name that includes scale, position, and horizontal or vertical so you can find it later.
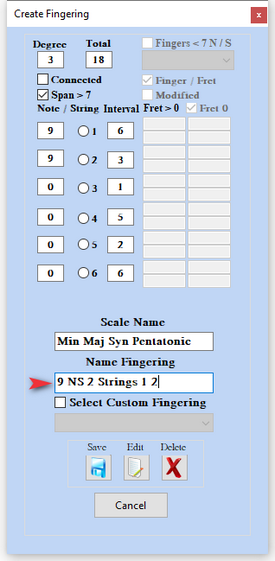
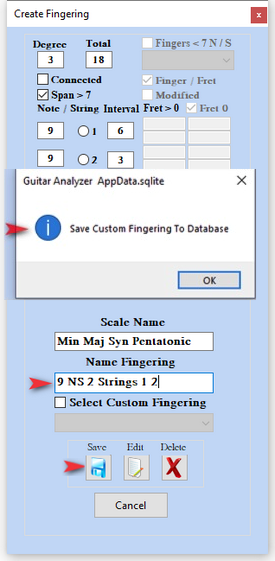
7) Save
Press Save. Confirm in the message box.
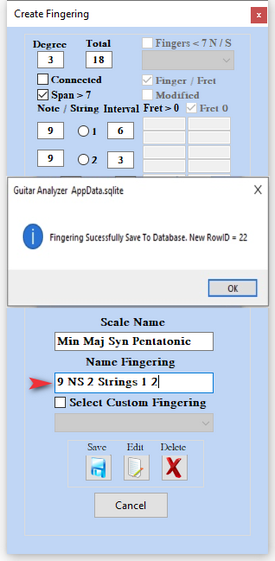
8) Confirm success
Path B — Connected fingering
See Add Finger Placement for Finger/Fret sets on each string.
Add Finger Placement
Assign finger numbers to a connected custom fingering (no unison notes) before you save it. Build the shape on the main fretboard, open Create Fingering, then set Finger/Fret and Modified sets per string.